Table of contents
Perhaps you’re familiar with the situation: you’re drilling through a tile and you’re almost done when suddenly, with a cracking sound, a fissure runs through the entire tile. To avoid this happening to you, read our guide below and learn how to drill holes in ceramic and porcelain tiles the right way. With the right technique and equipment, you won’t have to worry about damaging your tile wall – our guide shows you the proper procedure, step by step. You’ll also learn how to fix small mistakes and when it makes sense to consider alternatives to drilling.
What you should know before drilling into tile
During repairs or renovations, you’ll likely need to drill into tiles sooner or later. Many DIY enthusiasts are hesitant to do so for fear of damaging the delicate tiles, which is something that can happen quite easily. The reason is not only due to incorrect technique but often the use of unsuitable drill bits. Before you start drilling, it’s important you’re prepared with the right guide and equipment.
Choosing the right drill bit
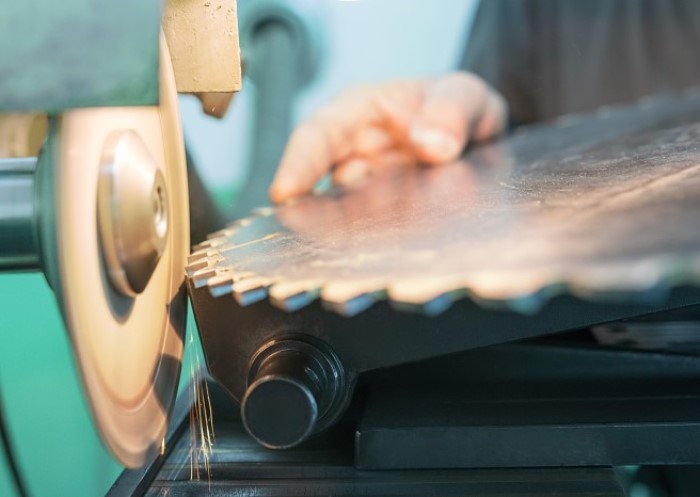
The type of drill bit you should use mainly depends on the scratch hardness of your tiles. Scratch hardness is indicated on a scale of 1 (soft) to 10 (very hard) and expresses how easily the surface can be scratched with a sharp, metallic object. The harder the grade, the more robust the drill bit needs to be. Diamond drill bits or diamond core bits are often used for tiles. Since diamond has the highest hardness grade of 10, you can even use such a bit to drill into porcelain tiles, which typically have a hardness grade of 8.
Drill bits differ not only in their hardness level but also in their shape.
- Tile bits: These bits are fully hardened and have a cylindrical drilling tip that either ends flat or is constructed as a drilling crown. If it is made of carbide, you can use it to drill into stoneware tiles, which have a maximum hardness level of 4. For all harder tiles, use diamond bits.
- Glass bits: Glass bits are ideal for tiles up to hardness level 3. The bits taper to a point and their tip is additionally hardened and sharpened, making it easier to keep the bit in the correct position when drilling the tiles.
- Stone bits: In theory, you can work on tiles with low hardness levels using a conventional spiral stone bit. The advantage is that you do not need to change the bit when drilling through the tile and into the wall. However, special care is required to prevent damage to both the tiles and the bit, making this method more suitable for professionals.
In addition to the type and quality of the tool, drilling pressure and speed are crucial factors in avoiding damage to tiles while drilling. Try to apply as little pressure as possible and set a low speed to avoid excessive friction heat. Cooling the drill bit is also important to prevent it from wearing out too quickly. Self-cooling tile drills are available in the market (with cooling wax or water tanks), but drilling can also be done without these features. In this case, it’s best to work in small steps and cool the drill bit with water in between.
The safest method is to first always use a glass or diamond drill bit to drill through the tiles and then switch to a stone drill bit for deeper holes in the masonry.
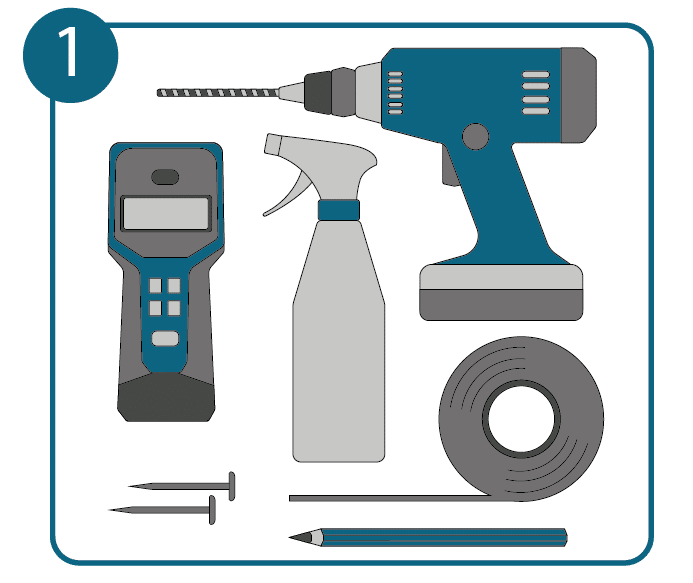
Required tools and accessories
In addition to an appropriate drill, you will need other tools to drill through tile without cracking it:
- Electric and metal detector to ensure that you don’t drill into a wire or pipe
- Marker pen to mark the spot where you want to drill
- Centre punch or nail to make a starting point for the drill bit
- Masking tape or transparent adhesive tape
- Bowl or spray bottle with cold water for manually cooling the drill bit
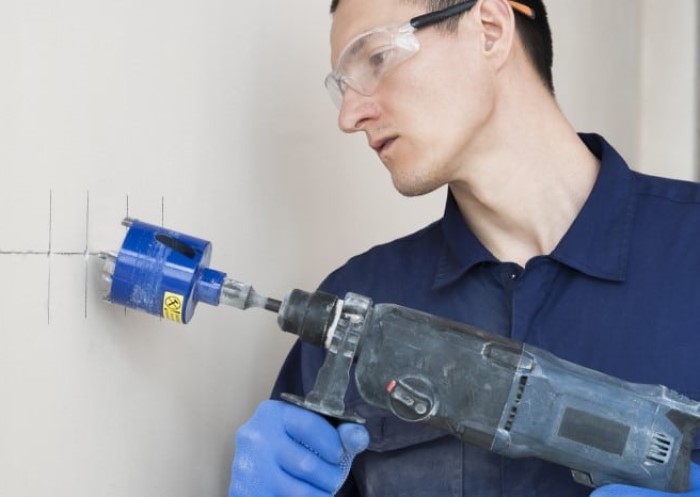
How to drill into tile (without cracking it): a guide in 6 steps
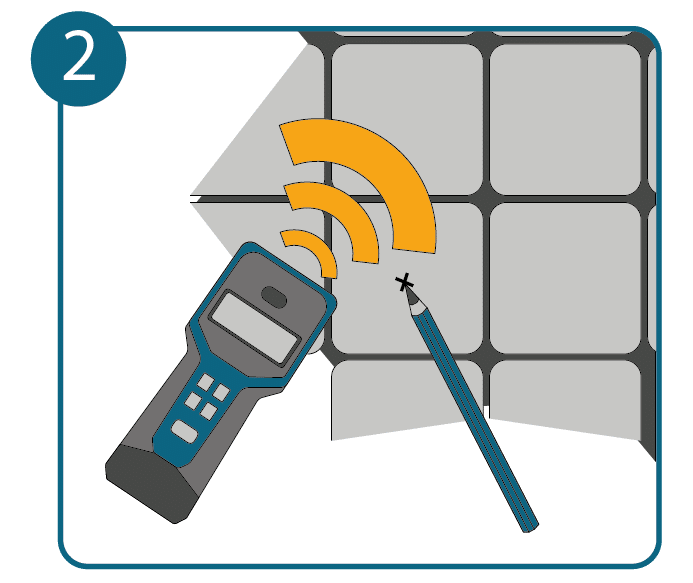
- Marking and indenting the drilling point
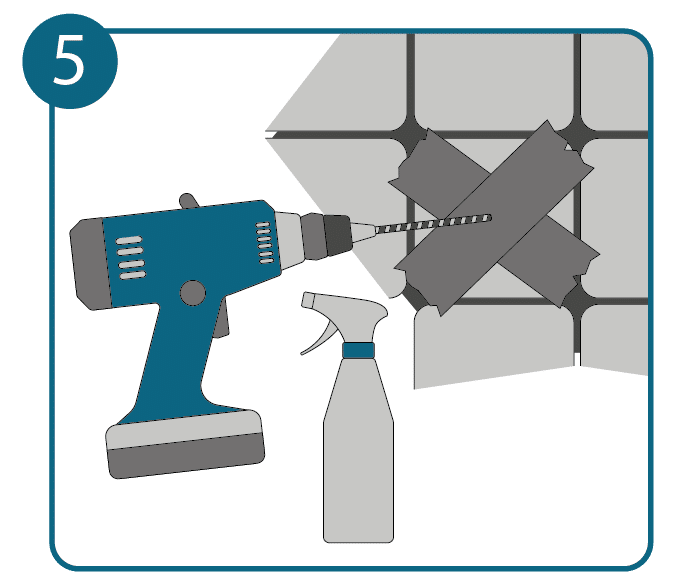
 Firstly, use a detector to check if there are any electrical or water pipes near the drilling point that you could accidentally drill into. Then, mark the drilling point with a visible pen mark and lightly indent the spot using a centre punch or nail. Try to avoid using a hammer, as even a slight blow can cause the tile’s surface to crack or chip. If you are using a diamond drill bit, then marking and indenting the point is not necessary.
 - Securely tape the drilling area
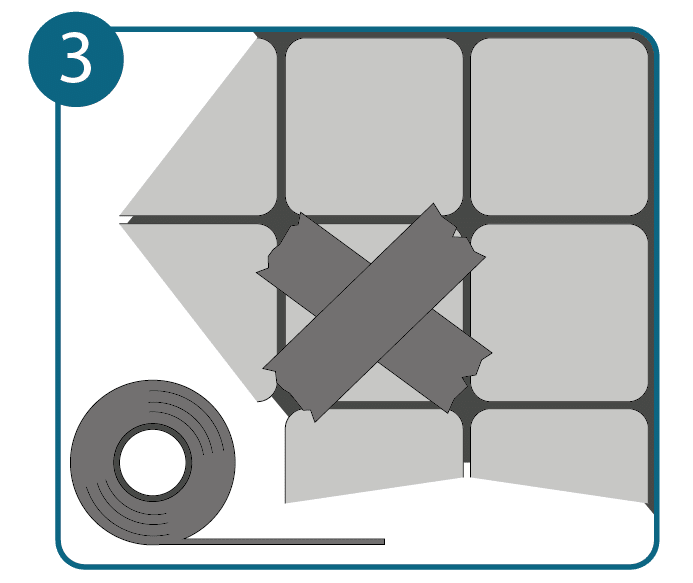
 Tape two strips of roughly four-centimetre-wide masking or adhesive tape in a cross pattern over the indented drilling point. This tape will help keep the drill bit in place and prevent any chips on the edges of the drilled hole.
 - Turn off the hammer function of the drill
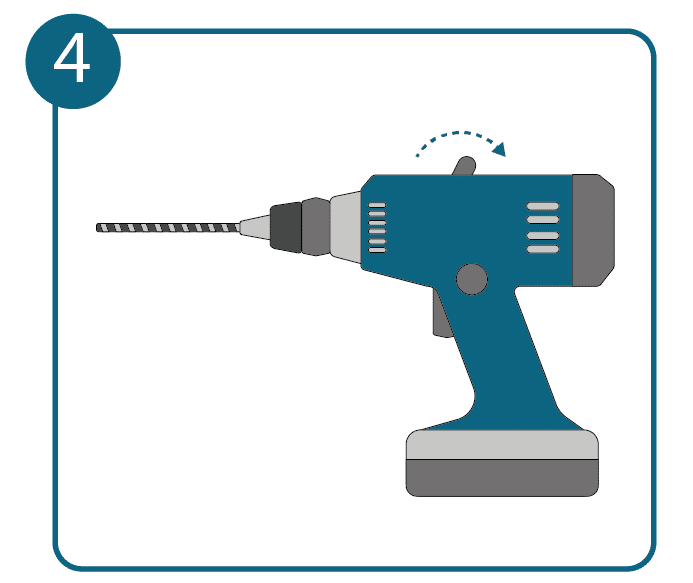
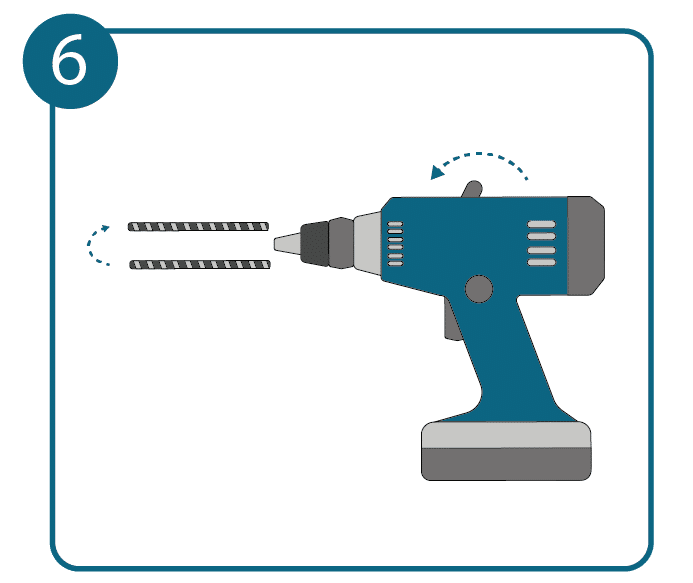
 If you are using a hammer drill, it is highly recommended to turn off the hammer function while drilling into the tiles. Hammer action increases the risk of tiles cracking while drilling.
 - Start drilling the tile
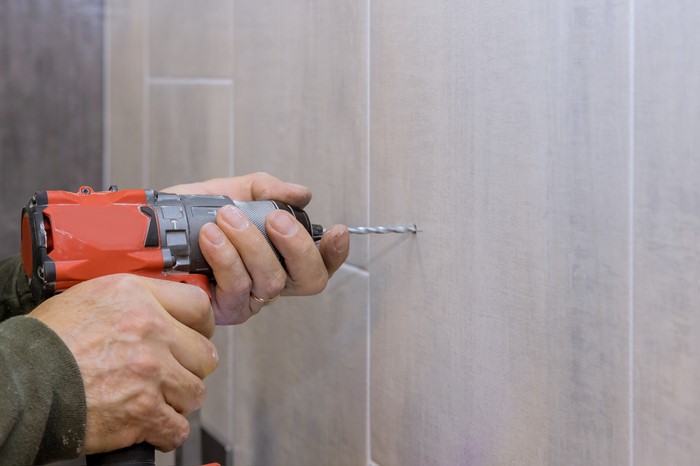
 Place the drill bit on the marked spot and slowly start drilling into the tile with minimal pressure and low speed. If you are not using a cooled drill bit, then regularly check the colour of the bit. If it changes, it is a sign of excessive heat. In such cases, take a short break and use the prepared cold water to cool the drill bit.
 - Start drilling the tile
 Continue drilling and cooling the bit until you drill completely through the tile. As soon as the resistance and noise of drilling change, you have successfully drilled through the tile without cracking it. If you require a deeper hole, switch to a masonry bit and turn the hammer action back on.
 - Clean the drilled hole
 Finally, remove the tape and clean the drilled hole by removing any dust or debris.
Fixing drilling mistakes
Even if you have the perfect equipment and work extremely carefully, drilling into tiles can be a tricky business even for professionals. We will present two common mistakes and how to fix them:
- Small splinters of the glazed surface often break off at the drill hole because too much pressure was applied during drilling, which can be a common mistake. However, such small imperfections can be repaired. To do this, distribute a suitable tile filler in the recess and then smooth it out with a spatula to create a level, smooth surface. Once the filler has hardened, sand the surface with fine sandpaper. Finally, you can use coloured spray paint to ensure that the repair is not noticeable.
- When a crack runs through the entire tile, the situation is different. Although you can also work with filler, the crack will still be visible. In the case of a continuous crack, you have two options:
- One, you can replace the tile and lay it anew, which is easily doable with the appropriate tiling tools and expertise. The replacement of a broken tile is only necessary in wet rooms because an intact tile backsplash prevents moisture from penetrating the walls.
- If you don’t want to replace the tile, the only option is to live with the flaw. In this case, you can either work with putty, and the crack will remain visible. Or you can use a simple tile sticker to cover up the crack.
Alternatives to drilling into tiles
Depending on the type of work you need to do, it may be possible to avoid drilling a hole in the tile. For mounting towel holders, coat hooks, or shelves, you can use double-sided tape or mounting adhesive. Keep in mind that bathrooms often have high humidity levels, so be sure to use only water-resistant adhesives.
For hanging shelves or cabinets, adhesives may not be sufficient. In this case, only screws and anchors provide a secure and load-bearing attachment. Since the diameter of the anchors is not too large, it is a good idea to drill into the grout lines. After removing the anchors, you can easily fill the holes with spackling paste, making them nearly invisible. This is especially beneficial in rental properties where landlords do not allow tile drilling.
FAQs on how to properly drill into tiles
The type of drill bit you should use with your drill machine depends mainly on the hardness of your tiles. The higher the degree of hardness, the more robust the drill bit should be. Diamond drill bits or crowns are often used for drilling tiles. Choose from the following drill bits:
• Tile drill bits are uniformly hardened and have a cylindrical drill tip made of carbide (for porcelain tiles) or diamond (for all harder tiles).
• Glass drill bits have a sharp, pointed tip. This makes it easier to keep the drill bit in the right position when drilling through tile.
• Stone drill bits have the advantage that you do not have to change the drill bit if you want to drill through the tile and penetrate deeper into the wall. However, special care is required to ensure that neither the tiles nor the drill bit are damaged in the process.
If you’re wondering how to start drilling through porcelain or ceramic tile, then you’ll need the following pieces of equipment:
• A drill bit suitable for the hardness level and material of the tiles
• A power and metal detector to ensure that you do not drill into a wire or pipe
• A pencil to mark the drilling spot
• A centre punch or nail to create a small indentation for the drill bit
• Masking tape or clear tape to give the drill bit traction
• Bowl or spray bottle with cold water to manually cool the drill bit during drilling
The choice of suitable anchors depends not on the tiles themselves, but on the building material of the wall behind the tiles. When drilling, you can tell what type of material the wall is made of by the colour of the drill dust. Accordingly, you should use appropriate anchors. If there is a cavity behind the wall, special cavity anchors provide secure anchoring.
Image source:
© gettyimages.de – photovs